


House Renovation: Electrical Planning Guide
Updated: Aug 18

House Renovation: Electrical Planning Guide
Planning the electrical work for a house renovation requires balancing immediate power needs, future-proofing for tech, and maintaining safety compliance.
Key Electrical Renovation Checklist
1. Main DB Board & Power Capacity
Assess Main Supply: Older landed or residential properties often sit on single-phase supply (40A or 63A). If you plan to install multiple high-power appliances (e.g., induction hob, instant water heaters, oven, EV charger, multi-split aircons), consult an electrician to check if a 3-phase upgrade is needed.
Distribution Board (DB Box): Upgrade to a modern DB box equipped with individual MCBs (Miniature Circuit Breakers) and a reliable RCD/RCCB (Residual Current Circuit Breaker) to prevent earth leakage trips from downing the whole house.
Dedicated High-Load Circuits: Run separate isolators/direct lines for high-wattage units (ovens, hobs, aircon compressor, water heaters, dryer).
2. Room-by-Room Power & Lighting Layout
Kitchen:
Countertops: Place 2 to 3 double gang sockets above counter height (min. 150mm above splashback) for kettle, air fryer, blender, and coffee machine.
Built-in Appliances: Dedicated hidden sockets inside cabinetry for hood, hob, oven, microwave, dishwasher, and fridge.
Living & Dining:
TV Feature Wall: 4 to 6 sockets, plus recessed conduit for HDMI, optical cables, and wall-mounted TV power.
Work/Relaxation Zones: Floor sockets or USB-integrated wall sockets near sofa ends and dining tables for laptops and phone charging.
Bedrooms:
Bedside Switches: 2-way switches next to the bed so you don't have to get up to turn off main lights, plus USB-C wall sockets on each side.
Wardrobe/Dresser: Internal power points for hair dryers, styling tools, or LED cabinet lighting.
Bathrooms:
Water heater isolator switch outside the bathroom door.
Shaver/electric toothbrush socket placed away from direct splash zones.
3. Lighting & Smart Home Infrastructure
Neutral Wire at Switch Boxes: Request neutral wires to be pulled to every light switch junction box during rewiring. Most smart switches (Zigbee, Matter, HomeKit) require a neutral wire for stable operation.
Lighting Zones: Separate ambient (ceiling recessed downlights), task (under-cabinet strips, reading lamps), and accent lights (pendant lights, LED coves) onto separate switches/dimmers.
Data Cabling (Cat 6 / Cat 6A): Pull hardwired Ethernet cables from your main router location to the TV wall, home office/study, and mesh Wi-Fi node points to avoid wireless dead zones.
4. Safety & Height Standards
Standard Heights: Light switches (~1.2m to 1.4m from finished floor level); standard sockets (~300mm from finished floor level).
Concealed Wiring: Ensure all wiring inside brick/concrete walls is routed inside PVC conduits before plastering.
Earthing & Bonding: Ensure proper ground bonding for metal pipes, steel frames, and outdoor fixtures.
Where would you like to focus next for your renovation planning?
Plan smart home wiring and mesh Wi-Fi layout
How to estimate electrical rewiring costs and labor
Build a Detailed Room-by-Room Socket and Switch Count Checklist for your house renovation
Here is a comprehensive room-by-room checklist for planning power sockets, light switches, data points, and specialized power isolators.
You can use this breakdown to mark up your floor plan or hand directly to your electrician/interior designer.
1. Foyer & Entrance
Power Sockets:
1x Double gang (near floor/shoe cabinet) — for robot vacuum charger, shoe dryer/sanitizer, or accent lamp.
Switches:
1x 2-Way Main Entrance Light Switch (paired with living room/hallway switch).
1x Exterior/Porch Light Switch.
Special Points:
Power point near door frame for digital door lock/smart doorbell chime or CCTV hub.
2. Living Room
TV & Entertainment Unit:
2x Double gang (or 1x 4-gang) sockets — for TV, soundbar, gaming consoles, set-top box.
1x Data Point (Cat6) — direct LAN connection for lag-free TV streaming/gaming.
1x Concealed conduit — to hide HDMI/cables behind wall-mounted TV.
Sofa / Seating Area:
2x Double gang sockets with USB-A/C ports — 1 at each end of the sofa for phone/laptop charging.
General / Cleaning:
1x Socket on an open wall — for vacuum, floor fan, or air purifier.
Switches:
1-2 Gang Switch for ambient downlights.
1 Gang Switch for feature lighting (LED cove light or pendant light).
3. Dining Area
Power Sockets:
1x Floor-level or table-height Double Socket — for steamboat/hotpot, food warmer, or laptop.
1x Double Socket above side credenza / buffet counter — for coffee machine or water dispenser.
Switches:
1-2 Gang Switch — for main dining light / feature pendant.
4. Kitchen
Countertop Appliance Zone (Splashback area):
2 to 3x Double gang sockets (placed min. 150mm above countertop, away from sink) — for kettle, air fryer, blender, toaster, coffee grinder.
Built-in & Under-Counter Appliances:
1x Dedicated Socket (inside lower cabinet) — for Dishwasher.
1x Dedicated Socket (inside lower cabinet) — for Water Purifier / Under-sink filtration.
1x High-level Socket — for Cooker Hood.
1x High-load Isolator / Direct Power Point — for Electric/Induction Hob & Built-in Oven.
1x Dedicated Socket — for Refrigerator.
Switches:
1-2 Gang Switch — for main ceiling lights and under-cabinet LED task lights.
5. Utility / Service Yard / Balcony
Power Sockets:
1x Double gang socket (high level or weather-resistant if outdoors) — for Washing Machine & Dryer.
1x High-level socket — for Automated Laundry Drying Rack.
Switches:
1 Gang Switch — for yard/balcony ceiling light.
6. Master Bedroom
Bedside Tables (Left & Right):
2x Double gang sockets with USB-C (1 set per side) — for bedside lamps, phone/watch chargers, CPAP machine.
1x 2-Way Light Switch (1 set per side) — to turn off bedroom lights directly from bed.
Dressing Table / Desk:
2x Double gang sockets — for hairdryer, hair styler, vanity mirror lighting, laptop.
1x Data Point (Cat6) — if using table as a home office setup.
TV / Wall Feature (optional):
1x Double gang socket + 1x Data point.
Switches:
1 Gang Switch — for main lights at bedroom entrance.
1 Gang Switch — for ambient ceiling cove/pendant lights.
1x External Water Heater Isolator Switch with indicator light (outside attached bathroom door).
7. Common Bedrooms / Study
Bedside:
1x Double gang socket with USB-C + 1x 2-way light switch.
Study Desk / Workstation:
2x Double gang sockets — for monitor, PC/laptop, desk lamp.
1x Data Point (Cat6) — hardwired internet for work/study.
Switches:
1-2 Gang Switch at entrance door.
8. Bathrooms (Master & Common)
Power Sockets:
1x IP44 Water-resistant Socket (or shaver socket placed safely away from shower spray) — for electric toothbrush, electric shaver, or bidet seat.
Switches / Control:
1x 2-Gang Switch (located outside bathroom door) — 1 for bathroom light, 1 for exhaust fan.
1x Water Heater Switch (Isolator) located outside door.
9. Hallway / Staircase / Corridors
Power Sockets:
1x Socket at mid-way point — for nightlights or vacuuming.
Switches:
2-Way Switches — 1 at start of hallway/stairs and 1 at the end/top of stairs so you can control lights from either end.
Pro-Tips for Electrical Planning
Neutral Wires at All Switches: Explicitly instruct your electrician to run neutral wires to every single switch gang box. This ensures compatibility with smart switches (Matter, Zigbee, Apple HomeKit) should you add smart lighting.
Conduit Placement for TV Wall: Ask for a 50mm PVC pipe embedded inside the TV wall behind plaster so all HDMI and power cords slide down effortlessly without exposed wires.
Data Point Hub: Route all Cat6 ethernet cables back to a central place (e.g., shoe cabinet, DB closet, or TV console) where your fiber modem and main router/network switch sit.
How would you like to refine this plan?
Adjust for a landed / multi-storey home layout
Calculate estimated power loads & DB capacity
Modifying Electrical Count for a Multi-Storey or Landed Home
Adapting an electrical plan for a multi-storey or landed home comes down to three main challenges: managing physical scale, handling higher total power loads, and managing outdoor/utility zones.
Here is how you should modify your checklist and infrastructure strategy for a multi-storey layout.
1. Power Distribution & DB Boxes
In a single-level home, one Distribution Board (DB) is enough. In a multi-storey house, running every single circuit back to a ground-floor DB box causes voltage drop, massive conduit clutter, and nightmare troubleshooting if a breaker trips upstairs at night.
Install a Sub-DB Box on Every Floor: Have a Main DB on the ground floor, with dedicated Sub-DB panels on upper floors (and basement/attic if applicable).
Why it matters: If a bathroom heater trips upstairs, you reset it on the same floor instead of walking down flights of stairs in the dark.
3-Phase Power Supply Upgrade: Multi-storey homes almost always require a 3-phase supply (e.g., 63A 3-phase). This allows you to balance heavy loads evenly across floors—for instance, placing major air conditioning compressors on Phase 1, kitchen/instant heaters on Phase 2, and general lighting/sockets on Phase 3.
2. Multi-Storey Lighting & 2-Way / 3-Way Switches
Navigating stairs safely requires smart light switching layout:
Staircase Lighting Control:
Install 2-way or 3-way switches at the bottom, middle landing, and top of every staircase.
Pro Tip: Use low-level step lights (recessed LED wall lights ~300mm from steps) connected to motion sensors so staircases light up automatically at night without switching on harsh main lights.
Master "Kill Switch" near Main Entrance / Master Bed:
Request a contactor or smart relay setup at the front door to turn off designated lights across all floors with a single touch when leaving the house.
3. Network Infrastructure & Wi-Fi Coverage
Solid brick, concrete floors, and multi-level slabs block Wi-Fi signals effectively.
Centralized Network Rack (Patch Panel): Reserve a small area (under the stairs or inside a utility cupboard) for a 19-inch network cabinet.
Dedicated Data Points per Level: Run at least 2x Cat6A data cables from the central network rack to ceiling/wall points on each floor for hardwired Mesh Wi-Fi Access Points (Access Points via PoE).
TV & Workstation Points: Ensure hardwired Cat6A outlets behind every TV wall and home office setup across all floors.
4. Outdoor, Porch & Gate Zones
Landed properties require extra outdoor electrical consideration:
Auto-Gate & Intercom Power:
1x Dedicated 15A/20A power isolator at the entrance pillar for the automatic gate motor.
Low-voltage cabling (or Cat6) from the gate to the living room/kitchen for an audio/video intercom and door release.
Car Porch / EV Charging Preparation:
Even if you don't own an EV yet, run an isolated, high-capacity cable (or a 32A 3-phase isolator / 22kW line) from the main DB to the car porch. Retrofitting this later through finished driveway tiles/plaster is expensive.
1x IP66 (weather-proof) double socket for pressure washers, vacuuming the car, or festive lights.
Garden & Perimeter Security:
High-level power points or PoE (Power over Ethernet) lines along perimeter walls/eaves for CCTV cameras and floodlights/motion sensors.
Separate outdoor RCD circuit breaker on your main DB—if outdoor garden lights short due to heavy rain, it won't trip the indoor electricity.
5. Roof / Solar & Water Systems
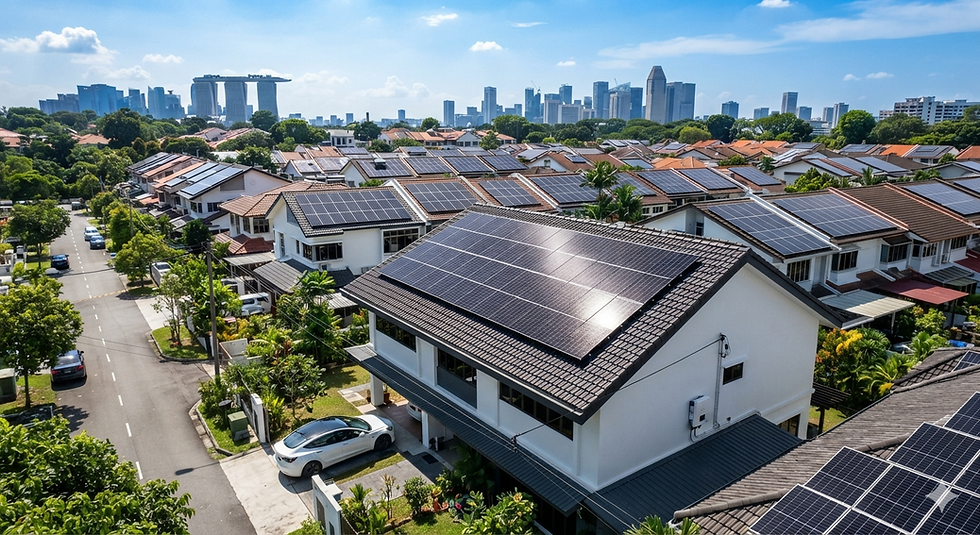
Solar PV Readiness: If you plan to install rooftop solar panels, ask your electrician to run a heavy-duty conduit from the roof space down to the main DB board during rewiring.
Water Booster Pumps & Solar/Heat Pump Heaters:
Multi-storey homes often suffer from low water pressure on the top floor. Reserve a dedicated isolator point in the roof space or yard for a water pressure booster pump.
Centralized storage water heaters or solar thermal systems need dedicated high-amp isolator points in the roof or utility area.
Which aspect would you like to detail further?
Plan EV charging point specifications for car porch
Designing the Structured Cabling and Wi-Fi Access Point Layout for a Multi-storey house
Designing structured cabling and Wi-Fi for a multi-storey house comes down to one core rule: use copper wires for fixed bandwidth, and use Wi-Fi strictly for mobility.
Concrete floor slabs and reinforced walls destroy Wi-Fi signals between floors. To get seamless, high-speed coverage throughout the house, you need a wired backhaul network with ceiling-mounted Access Points (APs) on every level.
1. Centralized Network Hub (MDF / Server Rack)
Pick a cool, out-of-the-way location on the ground floor or basement to serve as your Main Distribution Frame (MDF) — good spots include under the stairs, a DB cabinet room, or a utility closet.
Install a Wall-Mount Network Cabinet: A small 6U to 9U enclosure to house:
Fiber Termination Point (FTP) & ISP Modem (ONT).
Main Router / Gateway.
PoE+ Network Switch (Power over Ethernet): Powers your Wi-Fi APs and IP cameras directly over the Ethernet cable, eliminating the need for power outlets at each ceiling/camera location.
24-Port Cat6A Patch Panel: All ethernet cables from every room terminate here.
1x Double Power Socket inside or next to the rack.
2. Structured Cabling Standard: Cat6A
Always run Cat6A shielded twisted pair (S/FTP) cables rather than standard Cat6.
Why Cat6A? It supports 10 Gbps speeds up to 100 meters and provides better shielding against electrical interference when pulled through conduits alongside power lines.
Pull Strategy:
2x Drops per TV / Living Zone: Direct wired connection for TV, gaming console, or media streamer.
2x Drops per Home Office / Study Desk: PC, dock, or network storage (NAS).
1x Drop per Wi-Fi Access Point location (Ceiling): Terminated into a standard RJ45 keystones.
1x Drop per Outdoor IP Camera / Smart Doorbell: Run high up under roof eaves/gates for security.
3. Multi-Storey Wi-Fi Access Point (AP) Layout
Rather than relying on a single router pushing signals through concrete floors, deploy Ceiling-Mounted Wi-Fi Access Points (such as UniFi, TP-Link Omada, or Aruba Instant On) connected back to your PoE switch.
                  [ ISP Optical Fiber ]
                            │
                      [ ONT Modem ]
                            │
                 [ Main Router / Gateway ]
                            │
               [ PoE+ Managed Switch Panel ]
             ┌──────────────┼──────────────┐
             │              │              │
       (Ground Floor)  (First Floor)  (Second Floor)
          Ceiling        Ceiling         Ceiling
          AP Drop        AP Drop         AP Drop
Floor-by-Floor AP Placement Guidelines
Quantity Rule of Thumb: Plan for 1 Ceiling AP per floor (or 1 per 1,500–2,000 sq ft). If a floor has heavy concrete partition walls separating wings, you may need 2 APs per floor.
Staggered Placement: Do not place APs directly above one another on consecutive floors. Stagger them diagonally across levels to reduce co-channel interference and optimize vertical signal penetration.
Height & Position: Mount APs centrally on ceiling hallways or open living zones—avoid placing them inside metallic enclosures, behind wardrobes, or next to large mirror panels.
4. Seamless Roaming & VLAN Setup
To ensure you don't drop video calls when walking upstairs from the ground floor to the bedroom:
Unified SSID & Fast Roaming: Set all APs to broadcast the exact same Wi-Fi Name (SSID) and Password using 802.11r/k/v protocols (Fast BSS Transition). Your phone will hand off seamlessly to the closest AP.
Network Segmentation (VLANs):
Main Network: Laptops, phones, personal NAS/work devices.
IoT / Smart Home Network: Smart switches, robot vacuums, TV dongles, door locks (isolated from your main devices for security).
Guest Network: Isolated internet access for visitors.
Structured Cabling Summary Checklist
Location | Cable Drops (Cat6A) | Mount Type / Target Device |
|---|---|---|
Central Rack | All cables terminate here | Wall Cabinet / Patch Panel |
Ceiling (Per Floor) | 1-2 per floor | Ceiling Junction Box for PoE AP |
Living Room TV Wall | 2-4 drops | Wall Plate for TV / Console / Soundbar |
Bedrooms / Study | 2 drops per desk area | Wall Plate at desk height |
Roof Eaves / Gate | 1 drop per location | High-level PoE Security Cameras |
How would you like to proceed with your network layout?
Recommend specific Wi-Fi AP and PoE switch hardware brands
How to instruct electrician on pulling Cat6A conduits
What electrical specifications and wiring do I need to prepare for an EV charger in a landed car porch
Preparing your landed car porch for an Electric Vehicle (EV) charger involves establishing the right power capacity, pulling dedicated cabling, installing mandatory safety components, and meeting local regulatory standards.
1. Power Supply & Charger Speed Options
Charger Rating | Supply Requirement | Charging Speed | Ideal For |
|---|---|---|---|
7.4 kW AC (Single-Phase) | 32A dedicated circuit | ~35–40 km range per hour (~8–10 hrs full charge) | Standard choice for most landed homes with single-phase power |
11 kW AC (3-Phase) | 16A 3-Phase circuit | ~55–60 km range per hour (~4–6 hrs full charge) | Faster top-ups; ideal if your home has a 3-Phase power supply |
22 kW AC (3-Phase) | 32A 3-Phase circuit | ~100 km range per hour (~2–3 hrs full charge) | High-performance EVs; requires significant electrical capacity |
Recommendation: For a standard single-phase property (e.g., 60A or 100A main supply), 7.4 kW is the standard. If you are upgrading your home to a 3-Phase supply during renovation, provision for an 11 kW or 22 kW line to future-proof your setup.
2. Wiring & Cable Specifications
Dedicated Direct Line: Run a direct, uninterrupted circuit from your main Distribution Board (DB) or sub-DB to the car porch. The EV charger must never share a circuit with general sockets, outdoor lights, or aircon units.
Cable Type & Gauge:
Single-Phase (7.4 kW): 3-core armoured cable (e.g., XLPE/SWA/PVC or heavy PVC conduit in metal/heavy-duty plastic) with at least 6mm² or 10mm² copper conductors.
3-Phase (11 kW / 22 kW): 5-core armoured cable with 6mm² (11kW) or 10mm² (22kW) copper conductors.
Conduit Protection: All cabling running outdoors or along car porch walls must be encased in rigid galvanized iron (GI) conduits or heavy-duty UV-resistant PVC conduits to protect against mechanical damage and weather.
3. Mandatory Safety & Isolator Components
[ Main DB / Sub-DB ]
         │
  (32A MCB / Type B RCD Protection)
         │
  [ Outdoor GI Conduit Run ]
         │
  [ IP66 Rotary Isolator Switch ] (Mounted 1.2m–1.4m high, near vehicle bay)
         │
  [ LTA TR25 Approved EV Wallbox ]
Dedicated Circuit Breaker (MCB/MCCB): A dedicated miniature circuit breaker inside the DB panel matched to the charger rating (e.g., 40A MCB for a 32A charger).
Type A or Type B RCD (Residual Current Device): EV charging requires specialized Earth Leakage protection against DC residual currents (TR25 compliance requires a 30mA Type A RCD with a 6mA DC leakage detection device, or a Type B RCD).
External IP66 Weatherproof Isolator Switch:
Install an IP66 rotary isolator switch on the porch wall adjacent to the parking space (~1.2m to 1.4m above floor level).
This provides a physical emergency power cut-off right next to the car before power enters the wallbox charger.
4. Regulatory & Compliance Requirements (Singapore Standards)
TR 25 Standard: The charger model must be LTA Type-Approved and comply with Technical Reference 25 (TR 25). Look for the official LTA approval label on the wallbox hardware before purchasing.
LEW Endorsement: Fixed EV chargers must be installed, tested, and certified by an EMA-Licensed Electrical Worker (LEW). The LEW issues the Certificate of Fitness (C&F) required to register the charger on LTA's OneMotoring portal before official use.
LTA Registration: Once installed and certified, the charger must be registered with LTA to receive an official registration mark.
Renovation Contractor Checklist
When handing over instructions to your renovation electrician, request the following:
[ ] Run a 6mm² / 10mm² dedicated cable from DB to the car porch.
[ ] Reserve space inside the DB box for a dedicated MCB + Type A/B RCD.
[ ] Install a wall-mounted IP66 Rotary Isolator Switch at the car porch column (~1.2m high).
[ ] Ensure the LEW provides the TR25 installation endorsement & Certificate of Fitness.
Where would you like to focus next?
Explore solar PV panel integration with EV charging
Top LTA TR25-approved EV Home Wallbox Brands available in Singapore
In Singapore, every electric vehicle charger installed—whether in a landed property or commercial site—must carry the Land Transport Authority (LTA) Letter of No Objection (LNO) / Type Approval and comply with TR 25 safety standards (moving to SS 722 standard).
Here are the top LTA TR25-approved EV home wallbox brands currently leading the market in Singapore:
1. Wallbox (Pulsar Plus / Pulsar Max)
Origin: Spain
Highlights: Compact, sleek footprint (roughly the size of a toaster), smart dynamic load management, and excellent companion smartphone app (Bluetooth / Wi-Fi).
Power Output: Available in single-phase 7.4 kW and 3-phase 11 kW / 22 kW.
Why it's popular in Singapore: Extremely small and stylish, fitting neatly into tight car porch pillars without cluttering the aesthetic. Highly trusted by local electrical contractors and distributors.
2. ABB (Terra AC Wallbox)
Origin: Switzerland / Sweden
Highlights: Industrial-grade build quality, robust IP54 / IK10 weather and impact protection, built-in energy metering, and smart connectivity (Ethernet, Wi-Fi, 4G).
Power Output: 7.4 kW, 11 kW, and 22 kW models.
Why it's popular in Singapore: ABB is a heavyweight in Singapore's power infrastructure. The Terra AC series is one of the most widely deployed wallboxes across Singapore's private condos and landed properties due to its reliability and compliance record.
3. Schneider Electric (EVlink / Schneider Charge)
Origin: France
Highlights: Commercial-grade electrical safety, integrated circuit protection features, easy solar-sync setup, and smooth integration with smart home energy monitors.
Power Output: 7.4 kW to 22 kW AC models.
Why it's popular in Singapore: Preferred choice for homeowners who want seamless integration with Schneider's existing residential DB switchgear and home automation systems.
4. StarCharge (Artemis 22 CE / Artemis Series)
Origin: China (Global EV infrastructure leader)
Highlights: Sleek crescent-shaped design, IP55 / IK10 rated for outdoor car porch conditions, local OCPP 1.6J support, and competitive pricing.
Power Output: Configurable for 7.4 kW single-phase up to 22 kW 3-phase.
Why it's popular in Singapore: Backed heavily by local installers (like Utica and Charge+) for residential retrofits due to its balance of aesthetic appeal, durability, and cost-effectiveness.
5. Autel (MaxiCharger AC)
Origin: USA / Global
Highlights: Touchscreen or LED indicator variants, dynamic load balancing capabilities, RFID card access control (prevents unauthorized neighbors/visitors from plugging in), and top-tier mobile app analytics.
Power Output: 7.4 kW to 22 kW.
Why it's popular in Singapore: Excellent app interface and built-in access control make it a favorite for homeowners who want to restrict charger usage via RFID or mobile approval.
6. Charge+ (Marvel Series)
Origin: Singapore
Highlights: Ultra-slim profile designed specifically for local climate conditions, built-in dual-socket options, and native integration with Singapore's largest local CPO (Charge+) ecosystem.
Power Output: 7.4 kW to 22 kW.
Why it's popular in Singapore: Designed locally for Singapore's tropical environment and regulatory landscape, backed by strong local warranty and technician support.
Important Buying & Installation Reminders
Verify the Approval: Always ensure your chosen model is on the official LTA List of Type Approved Charger Models and carries the official approval label on the hardware.
Authorized Installer: Installation must be conducted by an EMA-Licensed Electrical Worker (LEW) who will test the setup, issue the Certificate of Fitness (CoF), and register the unit on LTA's portal.
Safety Isolation: Ensure your electrician mounts an IP66 rotary isolator switch within clear reach (~1.2m–1.4m high) next to the parking bay as mandated by TR 25.
Typical Cost factors and budget estimates for Full House Electrical Rewiring
Here is a breakdown of average cost ranges, itemized unit rates, key cost drivers, and typical exclusions for a full house electrical rewiring project.
1. Estimated Costs by Property Type & Wiring Method
Property Type | Exposed Surface Trunking (PVC Casing) | Concealed Wiring (Wall Hacking & Plastering) |
|---|---|---|
3-Room HDB | $2,800 – $3,800 | $4,200 – $5,800 |
4-Room HDB | $3,500 – $4,800 | $5,500 – $7,500 |
5-Room / Executive HDB | $4,200 – $6,000 | $6,800 – $9,500 |
Condominium (1,000–1,500 sqft) | $5,000 – $7,000 | $8,000 – $12,000 |
Landed Property (Multi-Storey) | $8,000 – $12,000+ | $12,000 – $22,000+ |
Note: Concealed wiring costs significantly more because it involves manual wall hacking, laying rigid PVC conduits into concrete/brick walls, and wet-works plaster reinstatement prior to painting.
2. Itemized Unit Cost Breakdown
If you are requesting a line-item quotation from an electrician or Licensed Electrical Worker (LEW), expect unit rates to fall within these standard ranges:
Single 13A Power Point: $70 – $90 per point
Double 13A Power Point: $90 – $130 per point
Lighting Point (wiring to junction box): $45 – $70 per point
2-Way Light Switch Control: $60 – $90 extra per pair
Data Point (Cat6 / Cat6A cabling): $100 – $150 per drop
High-Load Point (20A / 32A Isolator for Hob/Oven/Heater): $120 – $200 per point
Aircon Isolator Point (15A / 20A): $180 – $280 per set
New Distribution Board (DB Box) Replacement: $600 – $1,200 (includes MCBs, RCCB, and panel box)
3. Core Factors Driving the Total Budget
Concealed vs. Exposed Trunking: Choosing to hide wires inside concrete or partition walls is the single largest factor. Concealed wiring increases total labor cost by 40% to 60%.
Number of Electrical Outlets: Modern lifestyle expectations (home offices, entertainment hubs, smart home devices, kitchen gadgets) often double the baseline number of points provided in standard BTO/resale setups.
Power Capacity & Phase Upgrade: Upgrading an older single-phase supply to 3-phase (or upgrading a main DB box to handle heavy loads like EV chargers, multiple instant heaters, and multi-split aircons) requires additional LEW endorsement and SP Group coordination fees.
Smart Home Infrastructure: Pulling neutral wires to every switch box, running structured Cat6A data cabling back to a central rack, and setting up dedicated PoE lines add roughly 15% to 25% to basic cabling costs.
4. Common Exclusions to Budget For
Standard electrician rewiring quotes usually cover only cable laying, point termination, DB box installation, and basic faceplates. Be sure to budget separately for:
Light Fittings & Appliances: The cost of purchasing lights, track rails, ceiling fans, or smart switches yourself.
Make-Good & Painting: Electricians will plaster over hacked conduits, but smooth skimming and full-house painting require a separate painter/contractor.
LEW Endorsement & Permits: Mandatory LEW testing, submission, or Certificate of Fitness fees (especially for landed properties, EV chargers, or commercial-scale upgrades) usually range from $300 to $800 depending on complexity.
Contingency Buffer: Always set aside a 10% to 15% contingency budget for variation orders (e.g., adding extra sockets once furniture placement is finalized on-site).
Contractor
Engaging the right electrical contractor or Licensed Electrical Worker (LEW) is critical for ensuring code compliance (SS 638 / TR 25), insurance coverage, and long-term safety—especially for full house rewiring or complex landed home projects.
1. Top LEW-Certified Electrical Contractors in Singapore
When undertaking full-house rewiring, 3-phase upgrades, or EV charger installations, work with BCA-registered and EMA-licensed contractors:
VF Contractors Pte Ltd:
Specialization: BCA-registered and LEW-certified contractor specializing in full residential rewiring, 3-Phase power upgrades, and thermal imaging circuit diagnostics.
Best for: Complex residential overhauls, landed property rewiring, and sub-DB installations.
Luminous Engineering Pte Ltd:
Specialization: Engineering-led electrical contractor specializing in full rewiring, DB upgrades, and LTA TR25-compliant EV charger installations.
Best for: Comprehensive electrical renovation + EV wallbox integration under one contract.
Fortified (Full-Spectrum M&E / Renovation):
Specialization: Integrated renovation and M&E contractor where electrical works are supervised by in-house LEWs and coordinated directly with hacking, partition, and carpentry teams.
Best for: Homeowners doing a full architectural/interior overhaul who want one point of contact to avoid trade-handover delays.
Daylight Electrician / SG Electrical Services:
Specialization: Well-established contractors handling residential electrical installation, DB box upgrades, and point additions.
2. Essential Licensing & Qualification Checklist
In Singapore, electrical work is strictly regulated by the Energy Market Authority (EMA) and Building and Construction Authority (BCA). Always verify these credentials before signing an agreement:
Credential | What It Means | Why It Matters |
|---|---|---|
EMA LEW License | Licensed Electrical Worker (Electrician, Electrical Technician, or Electrical Engineer grade). | Legally required to supervise rewiring, issue test certificates, and submit load upgrade applications to SP Group. |
BCA Registration (ME05) | Electrical Engineering workhead registration under BCA. | Ensures the firm meets statutory financial, safety, and technical capability thresholds. |
LTA TR 25 / SS 722 Endorsement | Certification for EV charger installation. | Mandatory if you are installing an EV wallbox at your car porch. |
3. How to Manage Your Electrical Contractor
To prevent common scope gaps and variation order (VO) surprises during renovation:
Conduct a Joint Site Walkthrough: Walk the property with the LEW/contractor before hacking starts. Mark out precise socket heights, switch groups, wall sconces, network rack points, and DB box locations on the bare walls using masking tape or chalk.
Require Itemized Line-Item Quotations: Ensure the quote lists unit rates per power point, lighting point, data drop, and isolator rather than a single lump sum.
Clarify Wall Reinstatement: Confirm whether the contractor's quote includes wet-work plastering/skimming over hacked conduits or if your main builder/painter handles the reinstatement.
Mandate Post-Work Testing & LEW Sign-off: Before final payment, request an Insulation Resistance Test Report and the official LEW Certificate of Fitness (CoF).
House Renovation: Electrical Planning Guide


Comments